Hiya,
Hope you had a great week end!!Welcome to Use your scraps effectively - Tutorial series Part 2/3.If you have not read my previous tutorial, please click here.
I cut the PP strips from the cover page of Echo Park-Country Drive collection kit.I then pasted it on a 8*8 sheet of paper.Glue should be applied generously.
Let it dry.Now turn it 90 degrees and cut it to approximately 0.5" strips.
Take a cardstock and glue down the strips as you like
Tada!! an awesome bg is ready!!
Here is the finished card..Look at the cute handmade button,sitting in the middle.. i love it!!See how to make such buttons here.This card is completely made from scraps!!!(Scraps for bg,die cut butterfly,ribbon, paper pleating,tag,bow,and button)I used my new glue pen to paste the 2mm pearls..I should say it is amazing!!
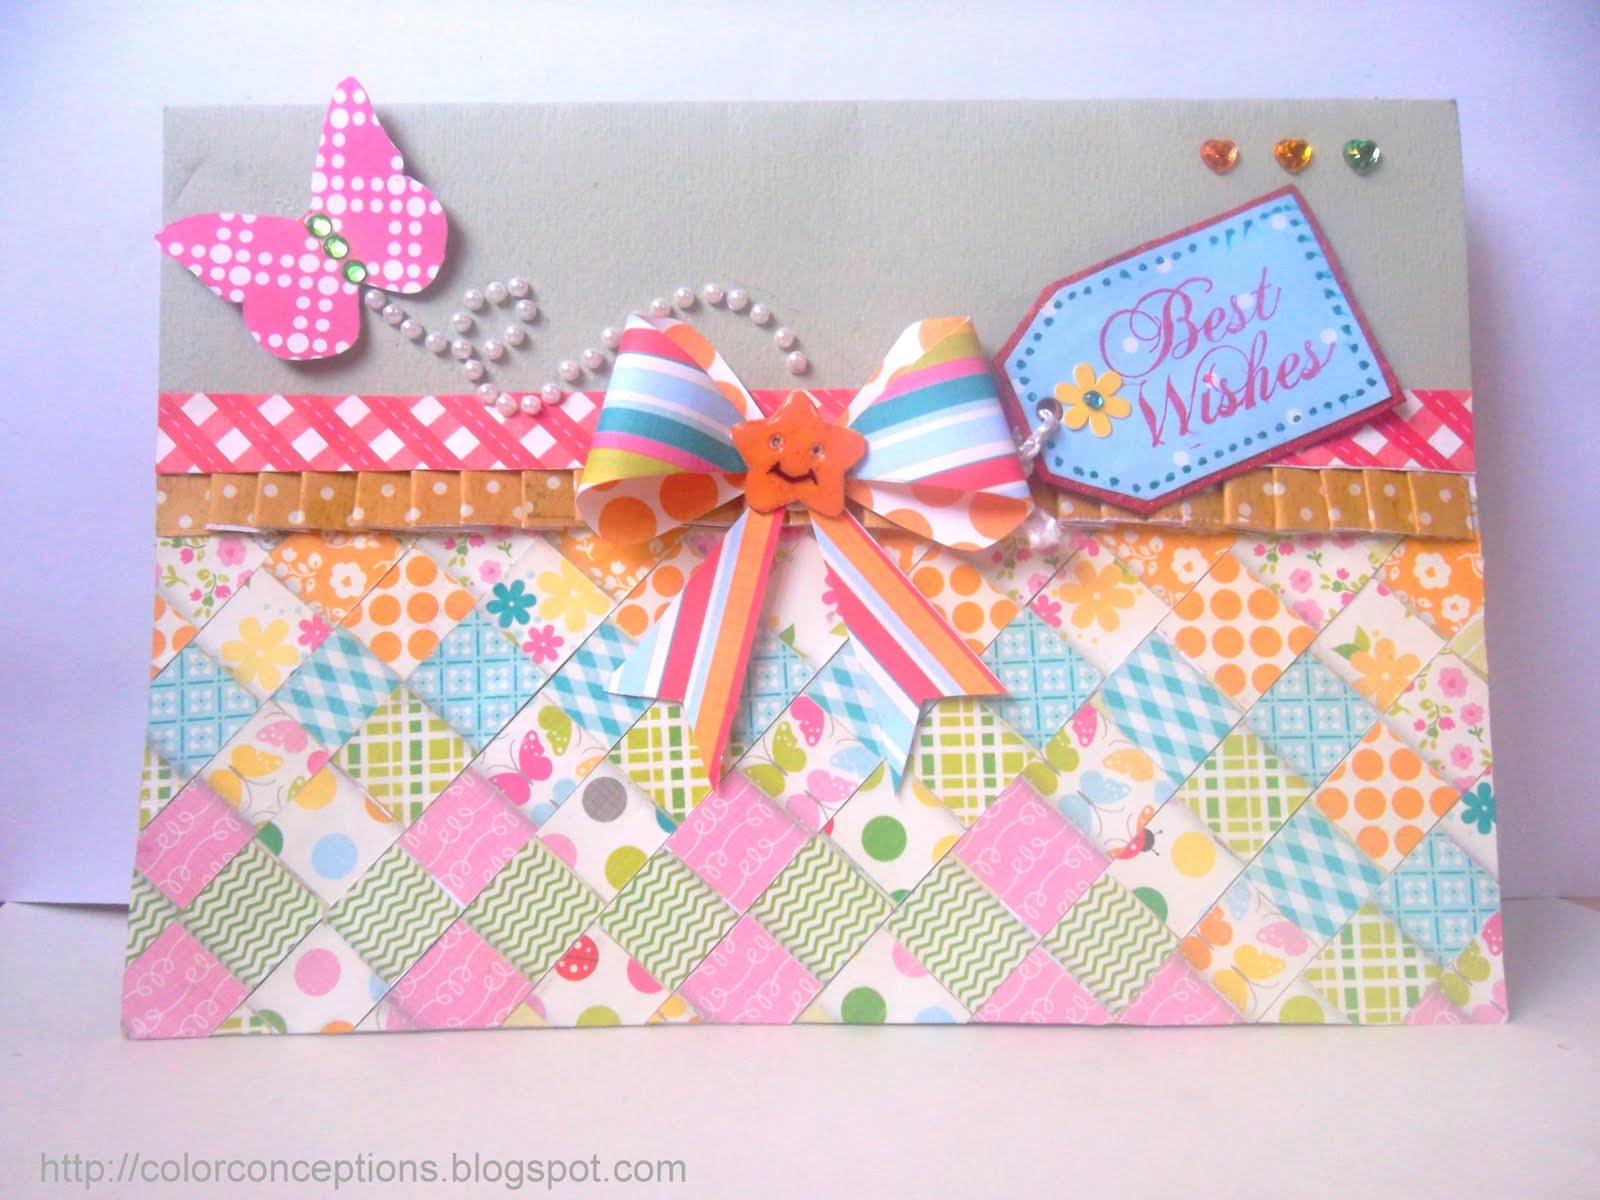
I am sending the above card to ICRC12- Dots and stripes+tag it.
This card is made from the scraps of the scraps from the previous card.. :)how beautiful is that?!
Come back for more tomorrow!!Leave a comment to let me know if you are enjoying my tutorials!
Thanks for visiting!
-Priya
Showing posts with label Pattern paper scraps. Show all posts
Sunday, November 6, 2011
Saturday, November 5, 2011
Use your scraps effecitvely - Tutorial Part 1
hi ladies,
As promised, I have started my tutorials!.It is gonna be a 3 day tutorial series, starting from today, on how to use your scraps effectively!how do you like it?!
I am a miser, when it comes to DPs.I am not ashamed to tell this..he..he.. I store even a small bit of PP, hoping that I would use it someday!! I knew that someday would nt come and I resolved to use them ,if not fully, atleast a part of them.So here you see the result of it.. :)
Today we will see how to make buttons and epoxy stickers with Pattern paper!in any shape,color or design you want!!Sounds good?huh?!
Take a chip board in the required size.I got quite a few of them with this year Diwali crackers..!I did a bit of recycling!If you do not have these, you can cut shapes from the carton box and recycle it!.
Stamp the required image , punch it and paste it on the chipboard.
Cut/punch the PPs in the chip board shape and paste on it.Now if you are making epoxy like stickers, paste the required sticker on the chipboard.
Apply Fevicryl Glue and Gloss generously over the chipboard!
Allow it to try for over 8 hours.
You need to prick any bubble that might have caught inside.. I did nt and you could see it in the photo..Look at the gloss over it!!! I really love it!!
Now do you see these gorgeous buttons?!This needs to be thicker.So glue 2 chipboards together.After pasting the pattern paper, poke 2 or 4 holes through the chipboard..Apply glue and gloss carefully, leaving out the holes and let it dry.Alas!! You have gorgeous buttons!
Hope you liked the tutorial..Come back tomorrow for the next part of this tutorial series!! Till then, have a great day!
Thanks for visiting!!
-Priya
As promised, I have started my tutorials!.It is gonna be a 3 day tutorial series, starting from today, on how to use your scraps effectively!how do you like it?!
I am a miser, when it comes to DPs.I am not ashamed to tell this..he..he.. I store even a small bit of PP, hoping that I would use it someday!! I knew that someday would nt come and I resolved to use them ,if not fully, atleast a part of them.So here you see the result of it.. :)
Today we will see how to make buttons and epoxy stickers with Pattern paper!in any shape,color or design you want!!Sounds good?huh?!
Take a chip board in the required size.I got quite a few of them with this year Diwali crackers..!I did a bit of recycling!If you do not have these, you can cut shapes from the carton box and recycle it!.
Stamp the required image , punch it and paste it on the chipboard.
Cut/punch the PPs in the chip board shape and paste on it.Now if you are making epoxy like stickers, paste the required sticker on the chipboard.
Apply Fevicryl Glue and Gloss generously over the chipboard!
Allow it to try for over 8 hours.
You need to prick any bubble that might have caught inside.. I did nt and you could see it in the photo..Look at the gloss over it!!! I really love it!!
Now do you see these gorgeous buttons?!This needs to be thicker.So glue 2 chipboards together.After pasting the pattern paper, poke 2 or 4 holes through the chipboard..Apply glue and gloss carefully, leaving out the holes and let it dry.Alas!! You have gorgeous buttons!
Hope you liked the tutorial..Come back tomorrow for the next part of this tutorial series!! Till then, have a great day!
Thanks for visiting!!
-Priya
Tuesday, October 25, 2011
CAS cards and Kanzashi flower tutorial
hello peeps,
Today's cards are completely CAS- All of them for CraftyJC. Though CAS is not my style, I occasionally enjoy making them.. :)But then, I have to restrict myself, the feeling of adding something more to the card.. :)
This is a simple Pattern Paper weaving, with scraps of leftover PP.Nothing much to say abt it..
This card is stamped with the Stampin up Best Dad Ever stamp set.. I love this set!and I like the dash of red in the card.
This card is also from the PP scraps.. The Butterflies are PTI diecuts,RAK from P.I am playing along this week's PDCC#104 colors
and MyTimetoCraft-White
WeeMemoriesWMC#73-Free for all
Hope you liked the cards!
Today's Tutorial
This is the tutorial I made for my Featured blogger post in Kavitha's blog.Kanzashi flowers can be made in satin cloth, ribbon,velvet and paper too..
Take felt in 2 colors(can be done in single color too)
Cut small squares with it.. need not be perfect, you can also try with circles.. it gives a different flower :)
Fold the squares in half
Join the below two ends
Secure the folds with safety pins
After it is done for all the 8 pieces, Sew them one by one ,removing the pins
Sew together the last petal with the first one and knot it below
Fill the center with button or brad or any other embellishment. Finally, the Kanzashi flower!! Is nt it gorgeous?!!
Today's cards are completely CAS- All of them for CraftyJC. Though CAS is not my style, I occasionally enjoy making them.. :)But then, I have to restrict myself, the feeling of adding something more to the card.. :)
This is a simple Pattern Paper weaving, with scraps of leftover PP.Nothing much to say abt it..
This card is stamped with the Stampin up Best Dad Ever stamp set.. I love this set!and I like the dash of red in the card.
This card is also from the PP scraps.. The Butterflies are PTI diecuts,RAK from P.I am playing along this week's PDCC#104 colors
and MyTimetoCraft-White
WeeMemoriesWMC#73-Free for all
Hope you liked the cards!
Today's Tutorial
This is the tutorial I made for my Featured blogger post in Kavitha's blog.Kanzashi flowers can be made in satin cloth, ribbon,velvet and paper too..
Take felt in 2 colors(can be done in single color too)
Cut small squares with it.. need not be perfect, you can also try with circles.. it gives a different flower :)
Fold the squares in half
Join the below two ends
Secure the folds with safety pins
After it is done for all the 8 pieces, Sew them one by one ,removing the pins
Sew together the last petal with the first one and knot it below
Fill the center with button or brad or any other embellishment. Finally, the Kanzashi flower!! Is nt it gorgeous?!!
Subscribe to:
Posts (Atom)


