Showing posts with label tips and tutorials. Show all posts

Wednesday, November 9, 2011

Special Boss Masculine card and Foam texture stamping tutorial!

hiya,

            My Hubby(Jagan) wanted a special card to his special manager, who quits his job to start his own company.. He presented a tie to Jagan and so Jagan wanted a tie in his card, like the one in this card.He also wanted the word Boss. So I sat down making this card.. with the Crafty JC color pallete#3 and ICRC12-Dots,stripes and tag and Card Patterns#140- flipped the sketch 180 degrees.

Again Stampin up Best dad Ever stamp set, Echo Park paper, my foam stamped paper,Inkadinkado sentiment, Pie lane button and Baker's twine


Today's Tutorial

        We have already seen how to use Foam as stamp. After experimenting, I am adding a  twist to it..I call it Foam texture stamping!! .. :)
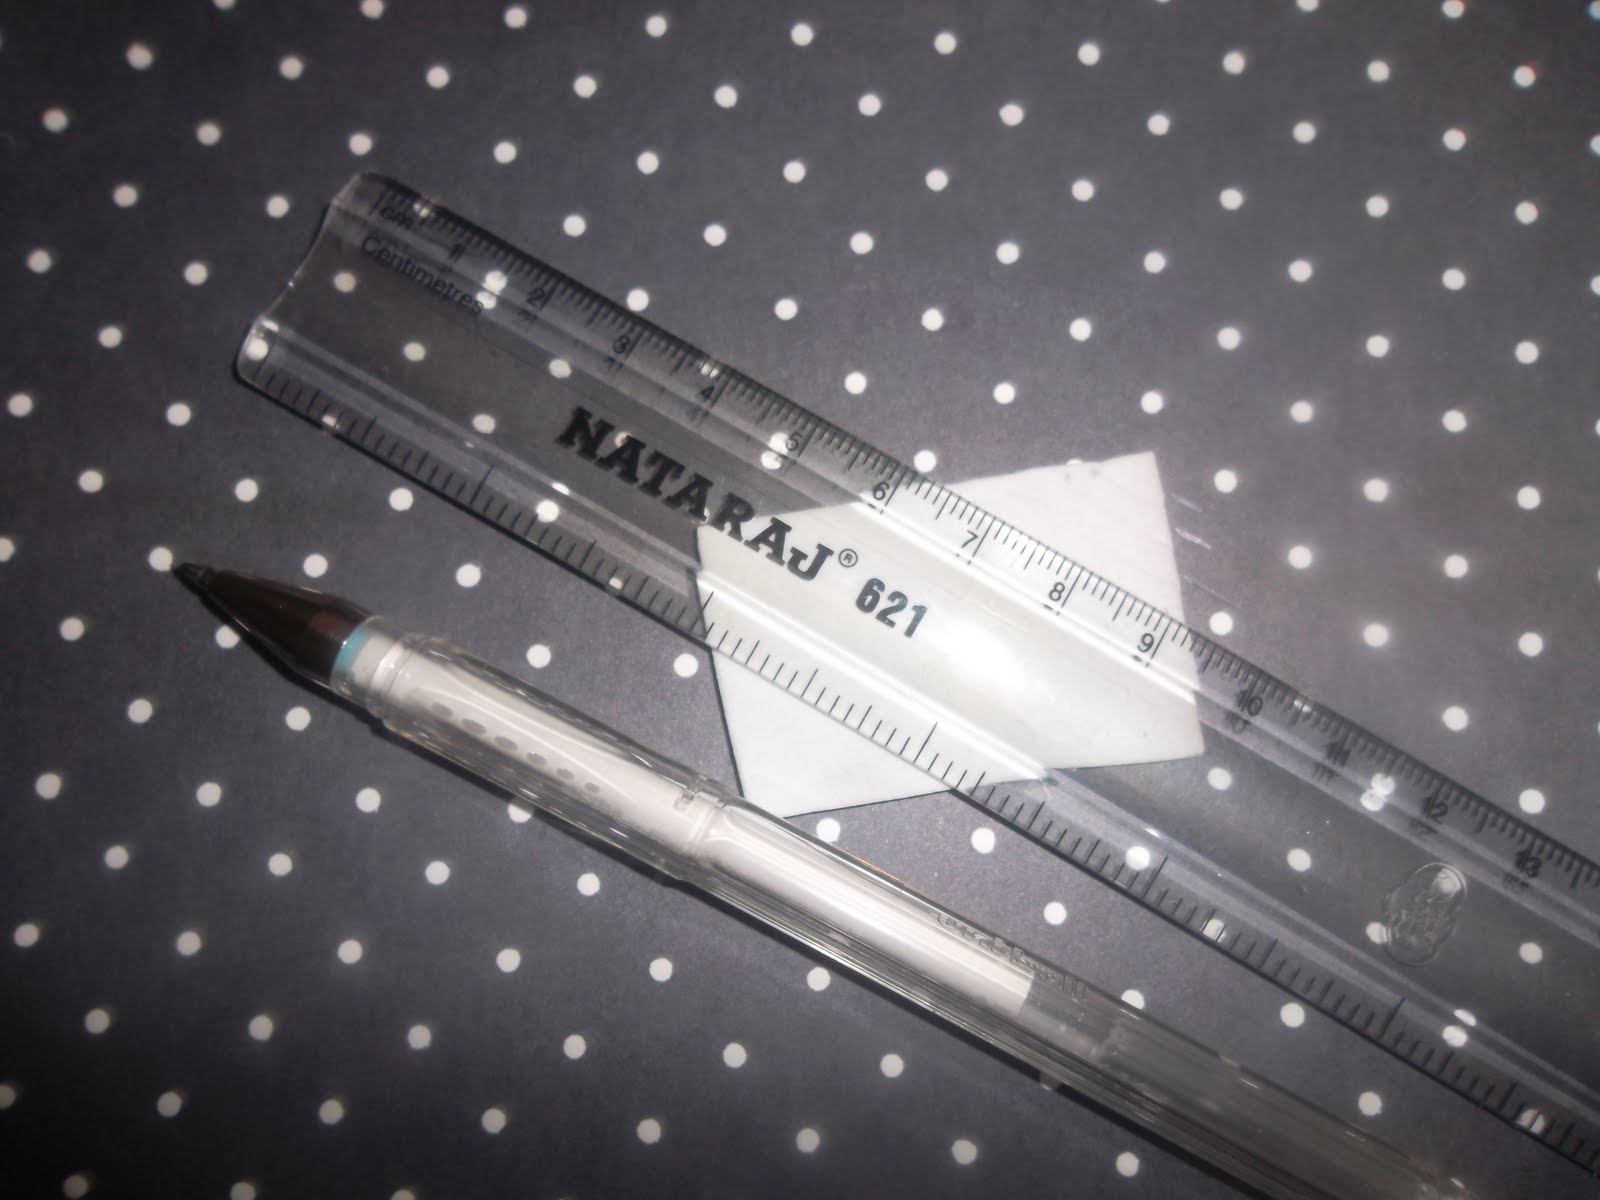
        Take foam in required shape and draw stripes, chks, dots over it with scale and empty ball point pen.
Glue it to the acrylic block using double sided tape.
Stamp it with the required color on paper.But Only one color for 1 foam.

See the stamped backgroud!!Just give it a try.. its amazing!!

Thanks for stopping by!

I have a giveaway running, details on the side bar.I host a challenge- use your PP scraps.would love for you to join in!

-Priya


Thursday, September 29, 2011

Smooched acrylic block stamping and Tutorial

hello ppl,

    I am thankful for the huge response, you give to my tutorials.. I am getting some tutorial request too.. You will see them soon :). I encourage you ppl, to ask for the tutorial you want.. I will be more than happy to make one for you.. :)Just leave a comment below..

    Ok,With all the stamping gurus out there , I do not know how I got the courage to post a tutorial on a stamping technique! :)) Correct me pls, if I am wrong somewhere..

    I made 2 cards in this Acrylic block stamping series.. One with smooching and one without it :)..here they come..


A spl look at the smooched block stamped card..


The bg of this card is done with a cookie box.. sorry, could nt show u.. it went to trash before I could photograph it :( Stamps are from Inkadinkado Brenda Walton flourishes..(It is available for sale in by blog now :))
I am sending this card for

Piali's Challenge in Yyam's blog - acrylic block stamping
Digital Tuesday - blue and white
MakeitMonday#58

Today's Tutorial

Today, we will cover this technique.
Ink your acrylic block generously...


spritz it with water..

Mount a stamp on another acrylic block...This has to be bold design, else it will not show well on the stamped image.


Kiss the blocks and stamp on paper...(thats why the name... :))


Some more for your viewing.. will use it in cards later

This is spritzed with water, near to block.


Spritzed with water far away from block


Did not spritz with water , but instead of pressing,rubbed the block on ink pad

Did not spritz with water , rubbed vertically and horizontally on the pad.


Feel free to experiment with different variations and share what you come up with me.. I ll be happy to see it!!

I will be on a break from tomorrow, for abt 10 days.. please leave any suggestion or tutorial request in the comment.. I will attend to it as soon as possible! I have scheduled some posts in my absence..so keep visiting :)

-Priya

Monday, September 26, 2011

Lace flower ,Tutorial- A Flower and Dye your ribbon

hi ladies,

Note:This is a picture heavy post

Hope you had a great week end!! Mine was busy with guests and a little crafting!!.. I have card for ICRC10 today.. I am so happy abt the way the lace flower turned out.. My second attempt in making sewed flowers(first one for ET's challenge) and my DH said wow!! The pink feather adds a touch of beauty to it!


and a close up


Pattern paper from Papermania.. I added some dots and flowers with gel pen to it..Sentiment from Inkadinkado All occasions, border from Fiskars corner lever punch and pearls and button from stash.The lace was in my stash for a long long time!

This card goes to,
digidesignblog - Make your own flowers
Ruby's Rainbow- for the girls
Ribbon Carousel -Fabric of our lives with Linda
Shopping our stash - no coloring allowed

Hope you like the card!! Please leave a comment!

Today's Tip

Today you have not 1 but two tutorials.
Tutorial 1:

I used this flower on top of the above lace flower.I dont know what it is called..I bought this in a cycle repair shop!!(if anybody knows the name, tell me) :)) yes.. My DH thought I am crazy!, when I stood in front of the cycle shop, to buy supplies.. :) I knew instantly, that I could make beautiful flowers with it..so here it is, for you to see in a card!

the inside of it is made of a thin rod, which can be bent.


You can bend a petal bend towards inside and the spacing is just right for bending the next petal


You can also make, 6,7 petal flowers..I find 8 petal flower is not looking so good.

Tutorial 2:

Have you ever searched for the right color or design of ribbon for your projects, but in vain..here is a solution!Dye and design your own Ribbon!!

Take a plain white ribbon and the ink pad color of your choice.

Now place the ribbon on ink pad and pull it through the sponge.Do it 2 or 3 times, till the color evenly spreads.. Do it again , to darken the color..

Take your gel pen and draw the designs you want.all the gel pens including the glitter ones work well for this.. Dont try to use markers, they spoil the ribbon

These are some of the ribbons I made..The green one in the above card, was also polka dotted similarly.. Now, I know, you are hurriedly scrolling to the top of the post!!

Do share your views on the tutorials.. Hope you enjoy them as much as I do!

- Priya

Sunday, September 11, 2011

Tutorial- Semi Circle penny slider baby boy card

hi girls!,

I know the title is soo long.. tried to shorten it.. but could nt.Following the baby girl card in thispost, my hubby wanted something similar for his collegue but for boy.. I had this semicircle slider in my mind and thought lets try it out.. after a few scraps that went to garbage, I finally succeeded in making one.


Do you remember the scallop circle pram , I made sometime back? If not you can check here.I drew a baby face on scrap cardstock and affixed behind it..Stickers are from Itsy Bitsy.PP from paper mania.. I felt the card was empty and added some dots(so many?) with markers..

Linking it with

ICRC9 - celebrate!
Pile it on -Layers
CRAFT challenge - Children
My Mum's craft shop - Layers
Fun with shapes
use Punch

Today's Tip

Today lets see how to make the semi circle mechanism. Draw 2 semi circles with same center,one 0.5 cm radius bigger than the other.Cut a piece of card stock slightly bigger than the outer semi circle.

Place a round double sided foam tape between 2 Re.1 coins.stick them together. Fix the card strip with a brad to the center of the two semi circles.


Slide the coins inbetween the semi circles.Glue the card strip over the coins. Run through the semi circles back and forth and confirm that it moves freely around.The moving part on ur card should be glued over the card strip.

You can use your ideas to cover it, the way you like!A simple idea would be flower and butterfly.If you make any cards using this technique, share it with me.. I ll be happy to see it!! Hope the tutorial was useful!

Wednesday, September 7, 2011

Tutorial - Easel girl dress card

hey peeps...
I am more excited to share this cute girl dress card! yes.. this is made with scallop circle!I just loved this idea.. and I showed this at ICR meet at Chennai .. and they were excited to see it too..You can see how to make Easel card here.

I made it in a size suitable for the frock and purse. The bg embossing is done without cuttlebug. See how to do it in this post.Sorry for that ink smear in the corner.


The sentiment is from Inkadinakdo and Fiskars(the word girl).


Linking up to the following challenges
sweetstampinchallenge-anything but birthday
CutecardThursday- A pinch and Punch
Audsentimentschallenge-card/sentiment for girl
Ellephantastic-here come the girls


Today's Tip

It is so easy to make a damn cute dresses!!
You can cut out the flaps on either side of two scallops, as shown in fig 1,2.Or fold them to make frills in the frock..as in fig 3,4,5.


Take one of the cut pieces and place it below..


You need double sided PP for this.


here is some more..

P.S I have a sale on my blog.. something might be of interest to you..pls chk out http://colorconceptions.blogspot.com/p/for-sale.html

Sunday, September 4, 2011

Sea View Fun side step card ! and Tip - Foam as stamp

hi there,

This card became the newest favourite for my son!! yes.. he hugged
and kissed me for the card and says he will not let me give this to anyone!!:)).I guess he likes the cute Splash dance collection (octopus and dolphin)..and was so eager to help me out to place things on the card..OK..you can learn how to make side step card from here.


The PP is from Itsy bitsy.. the fish and the sea horse are self adhesive foam die cuts..I just drew eyes for them... suddenly I found no place for the sentiment and my son suggested to draw a yatch! yes.. ! I cut yatch from scrap paper pieces and stamped sentiment on its sail!..We had real fun in making it and hope you are having fun watching it!!!!

Challenges entered:
Corrosiveblogchallenge -funny or punny
sweetstampinchallengeblog -anything but birthday
desertislandcraftschallenge -3 or more of 10(dimensions,sentiment, nature inspired, little green)
bythecuteandgirly -bright and beautiful

Today's Tip

Foam as a stamp!
Yes.. you can use foam as stamps and even create backgrounds with it!

You can buy readymade foam die cuts,or cut using your dies or hand cut in required shape.Some punches also work(not all).glue it on CD case cover.Now apply ink over it and stamp on paper! you can never go wrong with them and it is so simple!!


Another background idea!!

Friday, September 2, 2011

Quilled wall hanging

hi there,

This is a quilled wall hanging I did about 15 months ago.. It went as a birthday gift for a friend. We happened to visit them last weekend.. and I felt so happy coz I would be able to photograph it!!I tried different types of flowers in it...Please have a look.


Today's Tip

Manage a tighter center and having it stay in place

When you first slip the Quilling paper through the slotted tool it should extend past the slot a little .. this bends as you roll. By placing a little amount of glue on the outer side of the paper, the next layer will glue in place to the starting end of the paper and hold together. This is very helpful when you remove the large circle from the slotted tool as sometimes the center will tend to pull out.

Wednesday, August 31, 2011

Tutorial - Heart Couple Double diamond card

hey peeps,

I am so excited to share this card ..and this is my first one for wedding!The tutorial for double diamond card is here.I did a smaller version of it - to fit the couple. Yes,I am on a diamond spree now .(Hint:some more diamond cards to follow..:))


Sentiment is from Making memories wedding set. Rest from the stash.
Ash and Tejal are gonna limit the number of entries for a challenge after this...am sure!

one more card for ICRC9 -Celebrate!
Phindy's Place- Make your own embellishment

Today's Tip

Today I will teach you how to make the heart couple.It is super easy!

Cut or punch a heart shape in black.Cut the heart in middle for abt half an inch.Fold on either side of center cut as shown.

Now cut a v shape on the 2 folds.Using an empty ball pen, draw a center straight line till the end.Now place a tie and triangle piece of white card stock behind the black heart.If you make the coat in shades of grey, you can sponge it with black ink, around the collar.


For the lady, cut v shape from the heart, as shown in fig.

now with empty ball pen, draw lines showing the breasts and folds in dress.With color pencils, shade the lower portion of the breast and the folds in dress..the coloring does not show clearly here..Place another skin color heart behind.Lightly sponge it with red color and you can decorate it as you wish!!


I will be out of town, for 5 days.. but have scheduled posts..so keep visiting :) I am off to visit my mom n dad! :)))

-Priya
Related Posts Plugin for WordPress, Blogger...